Written by: Robin Veinotte, Director of New Business Ventures
There is a new trend in the Vacation Rental space that is causing a lot of managers and builders to scratch their heads and seek an educated professional’s opinion. That trend is: converting old apartment buildings, or building new ones, and turning them into “hotel-like” vacation rental buildings. Everything, including your WiFi network, becomes increasingly complex and requires more robust commercial hardware when you take on a project like this. Guest expectations are raising and this shifts the industry even further into a traditional hospitality model with a little Vacation Rental flare.
The purpose of this blog is to share with you our recommendations on how to wire your Vacation Rental building to ensure the smoothest guest experience along with minimizing those pesky surprise costs. Note that we want to make it easy to run a “hotel-like” environment while preserving the ability to convert back into a residential building if that’s a possibility in the future. Don’t forget to take a look at our other blog post that provides tips on things to consider when building a WiFi network.
Recommendations (and don’t worry, we have pictures):
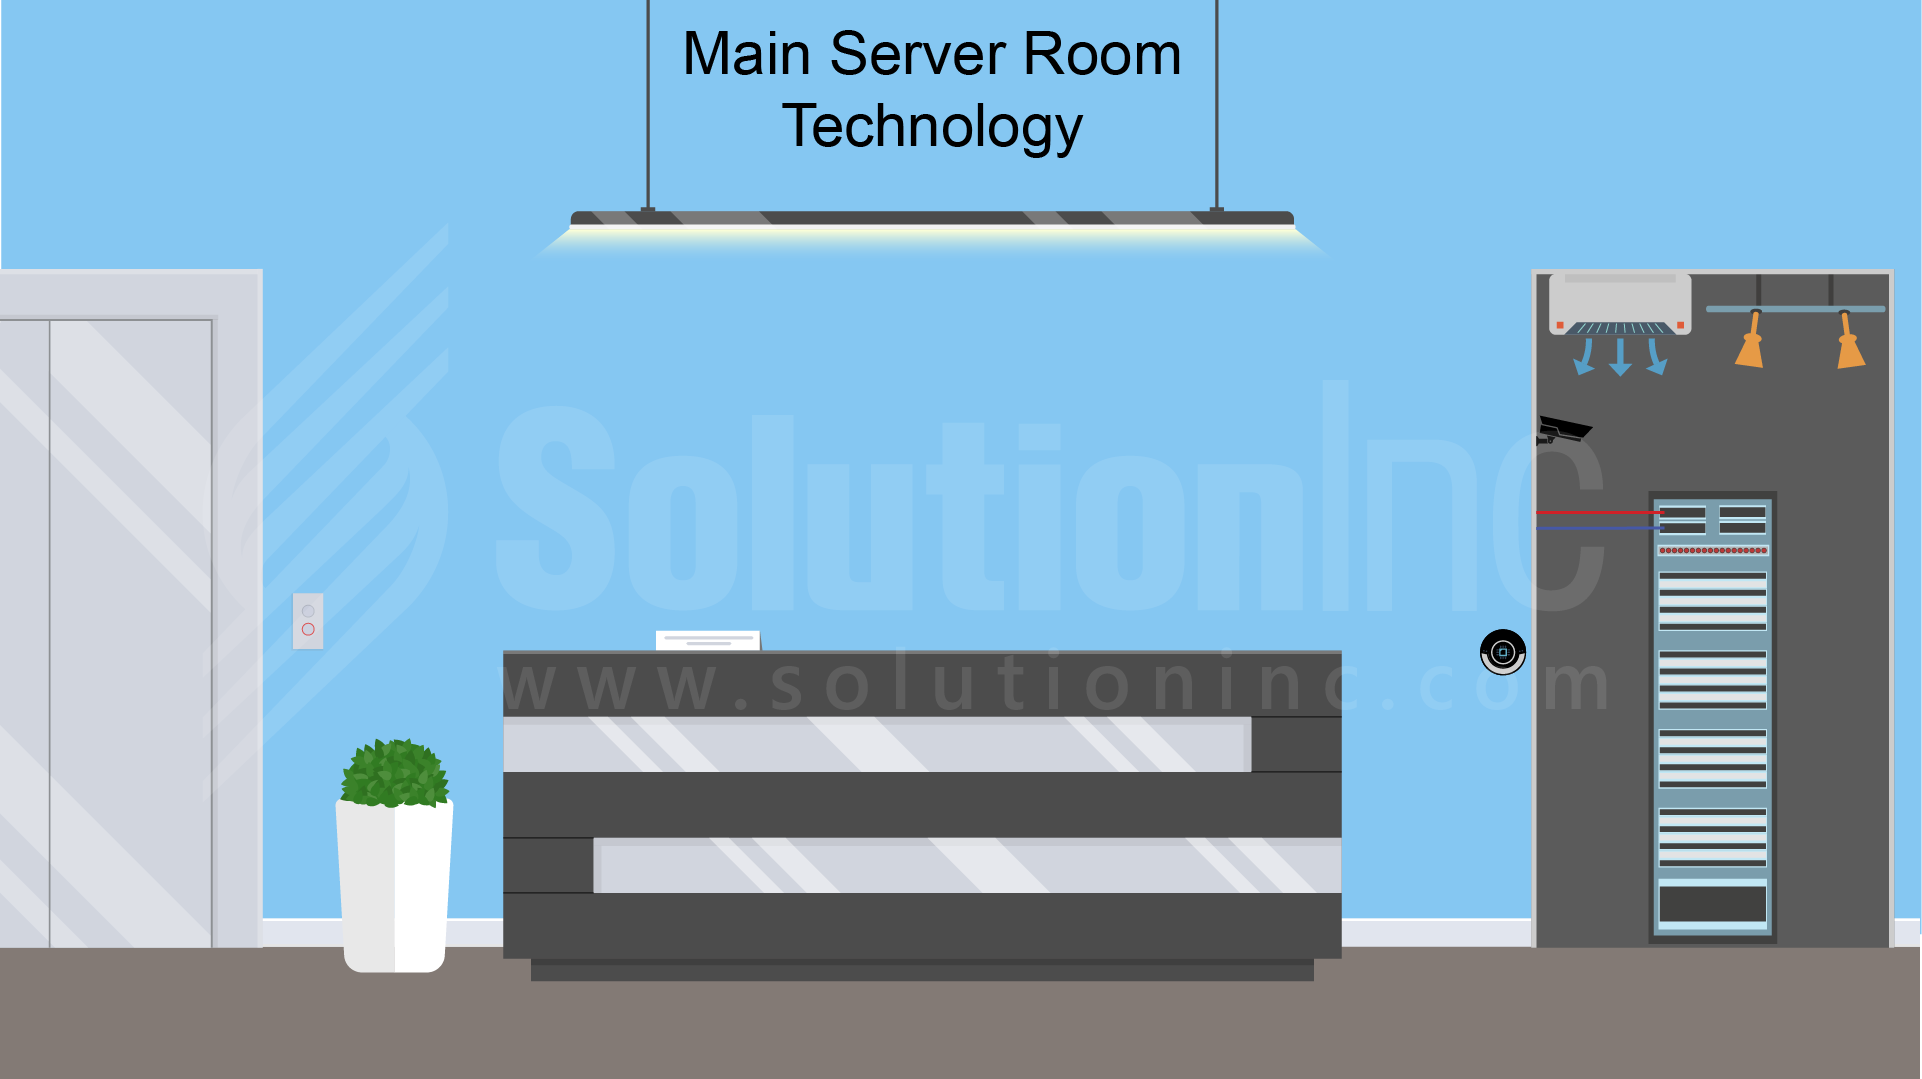
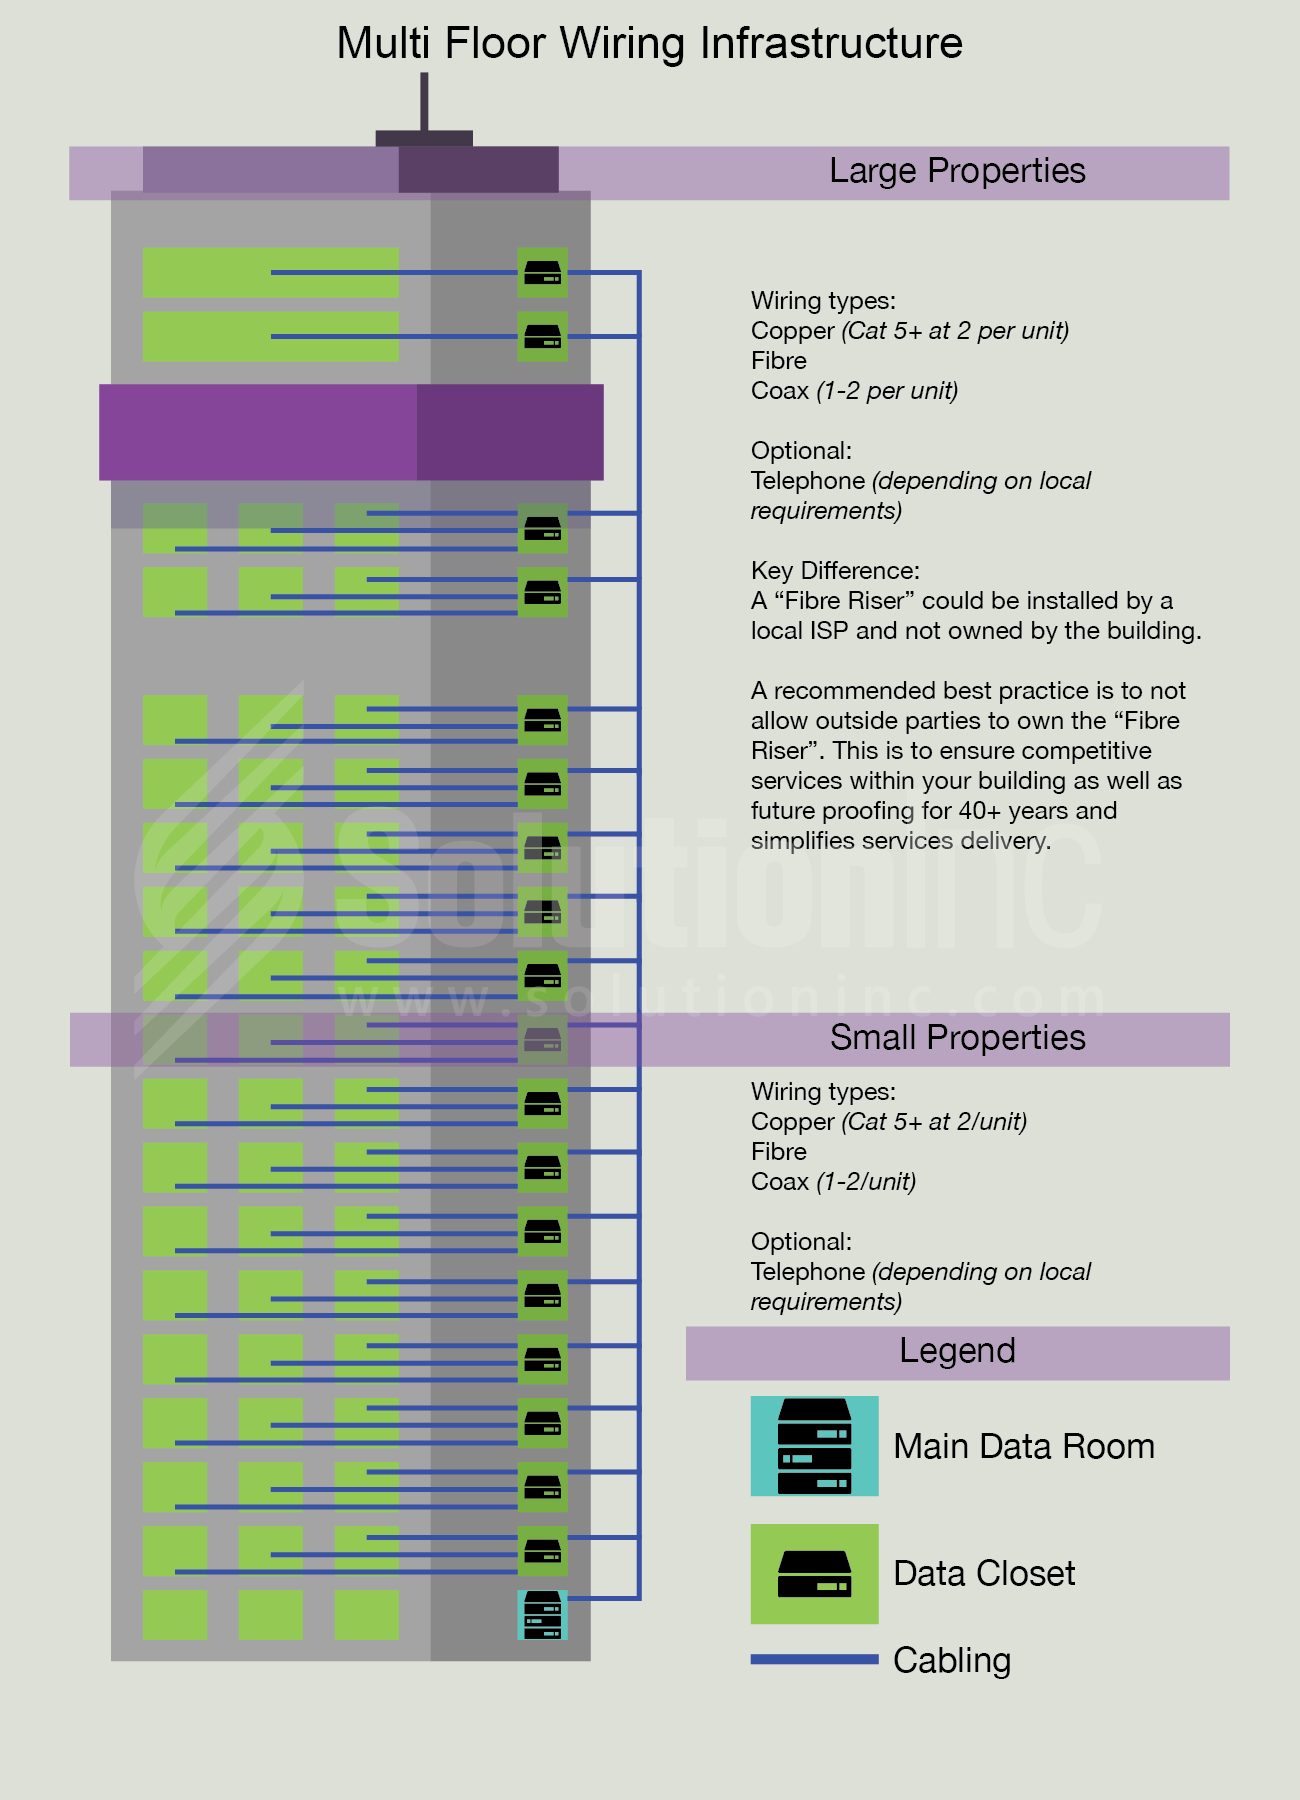
#1 There should be one “main” data room in the building servicing the property along with a smaller data closet on each floor of the building. Any commercial property would have one main data room because in these deployments the core of the equipment is kept out of the guest rooms, minimizing the need to place hardware in the guest rooms.
This is contrary to residential Vacation Rental properties, as your suppliers install routers, mini switches, etc, in each unit for segregation of client data and to simplify the install process. It may also differ if you have multiple units (but not all) in a single building or if you have multiple units spread out geographically.
#2 Ideally, you should have a main data room which should meet the following specifications:
- The room needs to be 8x8ft or 10x10ft. This leaves room for IT related storage as well as ample room to walk around the IT Equipment for service. It helps with cooling as well which allows for the equipment to operate at its optimal level.
- 20 Amp Power service, with 20amp power receptacles.
- 8000 BTU’s of cooling; a small 1ton mini split is more than enough, or some ventilation from the buildings core HVAC system will be fine if you intend to turn into a hotel with TV, Internet, etc.
- Note: This is the calculation for SolutionInc Services. If the building is intending to have security and other operations, getting a full tonne of cooling is an excellent idea (12,000 BTUs). Ideally, the vent blowing the cool air will blow down on the front of the data rack as servers pull air into the front, and pour the heat out of the back which will raise to the ceiling quickly.
- One full sized 42+U two post threaded data centre rack. This is typically fixed mounted to the floor or if attached to a cart, get a 4 post. This would be a common telco rack for the building, with the property needing 60-70% of the space. Local Telco’s could use it as well. These are inexpensive; typically less than $500.
- The main data room cabling patch panels should be terminated at the top of the cabinet (Cat6 and Coax).
- All cabling must be terminated and toned on both ends. Not doing this has the potential to be a large headache for your network managers and easily adds days onto an installation (which can cost a lot of money unexpectedly). It is important to know that your contractors should never close up dry wall/sheet rock over cabling of any kind without knowing for sure the cabling is working. That means testing the wiring!
- Between the main data room and each additional floor data closet is where your Cat6 data cables run (see explanation on the data floor closets below).
- For example: Floor 1 (main data room) to Floor 2 = Four Cat6 Run.
Floor 1 to Floor 3 = another Four Cat6 Data Runs. With Mixed residential and commercial deployments, we are seeing many land lords that run up to ten Cat6 between their main data room and each floor in case of any future technologies or service providers (ie the upcoming trend of Fibre networks being added into buildings).
- For example: Floor 1 (main data room) to Floor 2 = Four Cat6 Run.
- A working light fixture. Kind of difficult to provide maintenance if there is no light, right?
- Optional: secure lock system only allowing designated vendors access to this room.
- Optional: A video camera to ensure security of the space.
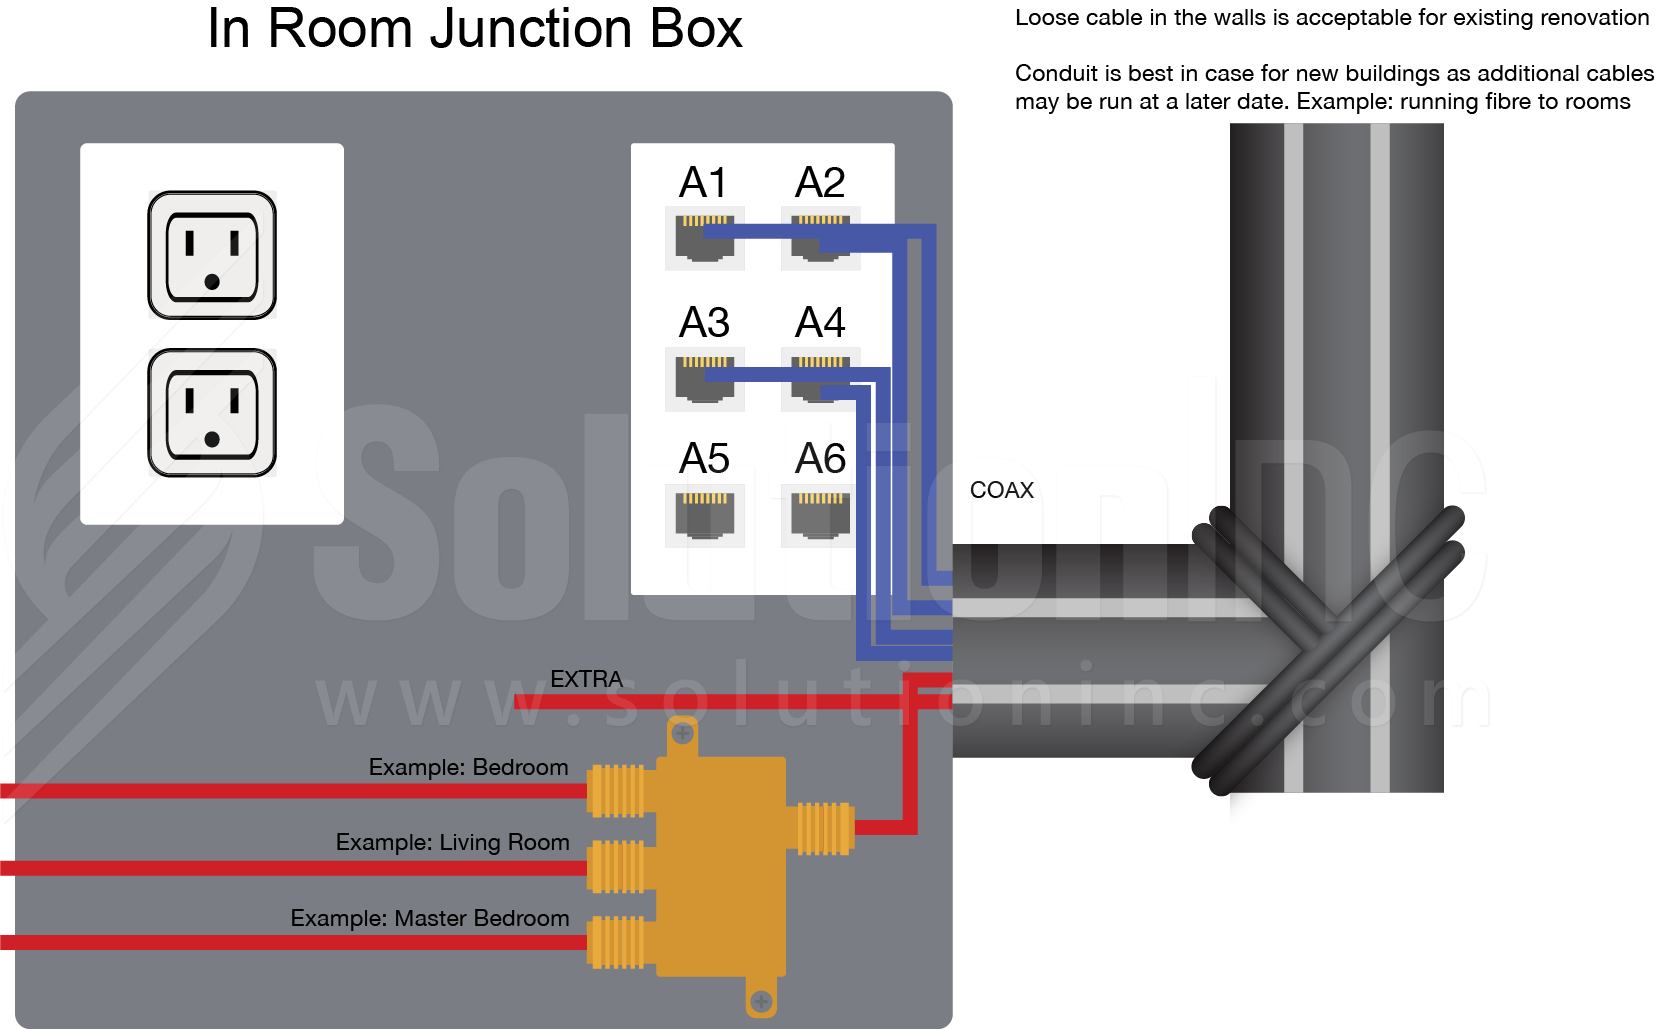
#3 All the other floors within the building should have a data closet 4x6ft. We recommend a small data closet on each floor to easily manage all of the technology on each floor.
- Wall mounting equipment in each closet to house necessary switches.
- For existing properties being renovated into Vacation Rentals: loose cable in the walls is acceptable.
- For properties under construction: conduit is recommended in case additional cabling is required for new services, although it could be cheaper to just run Ethernet cable now VS conduit.
- Standard power is acceptable for these room as typically only smalls amounts of power would be consumed by network technologies per unit, per floor.
- The cabling in these closets will correspond with the cabling in the main data room, explained above.
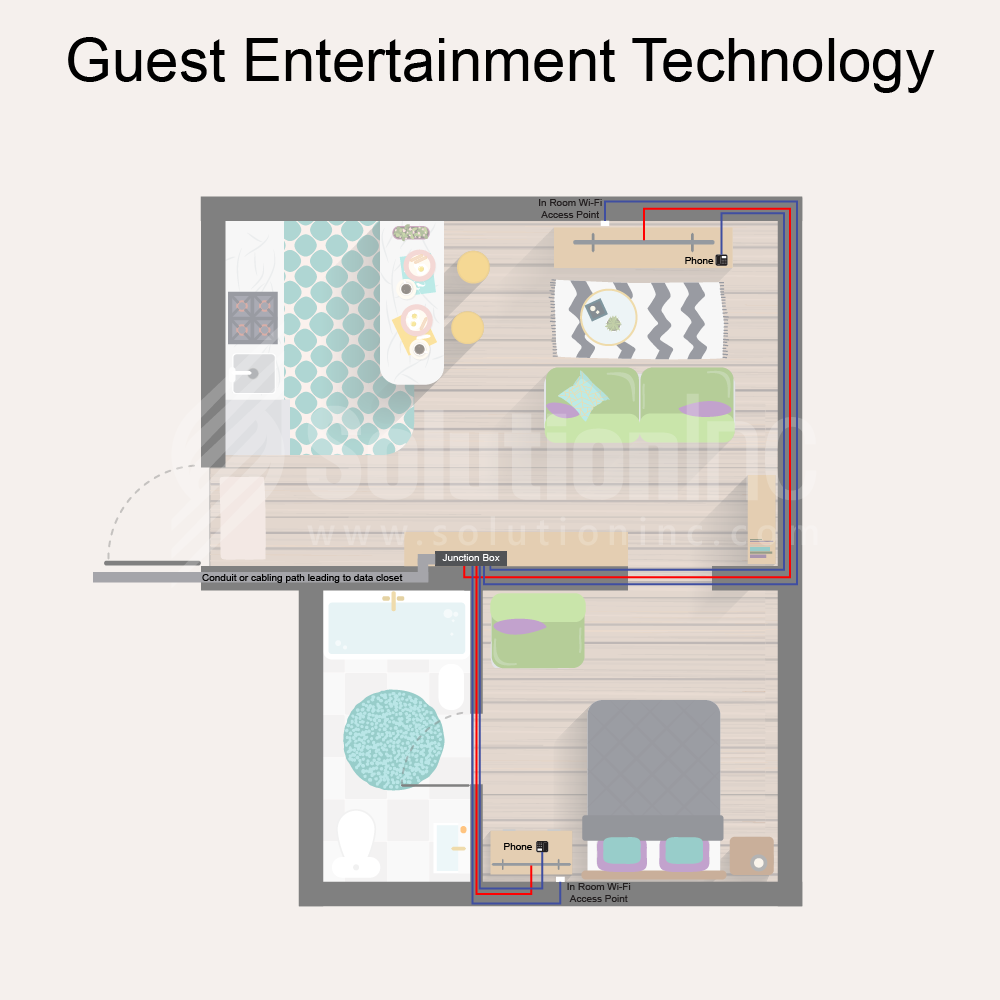
- An example of how the cabling would be run from the main data closet to the individual floor closets can be seen below:
#4 Each unit within the property will also need a certain amount of technology to ensure the highest guest experience.
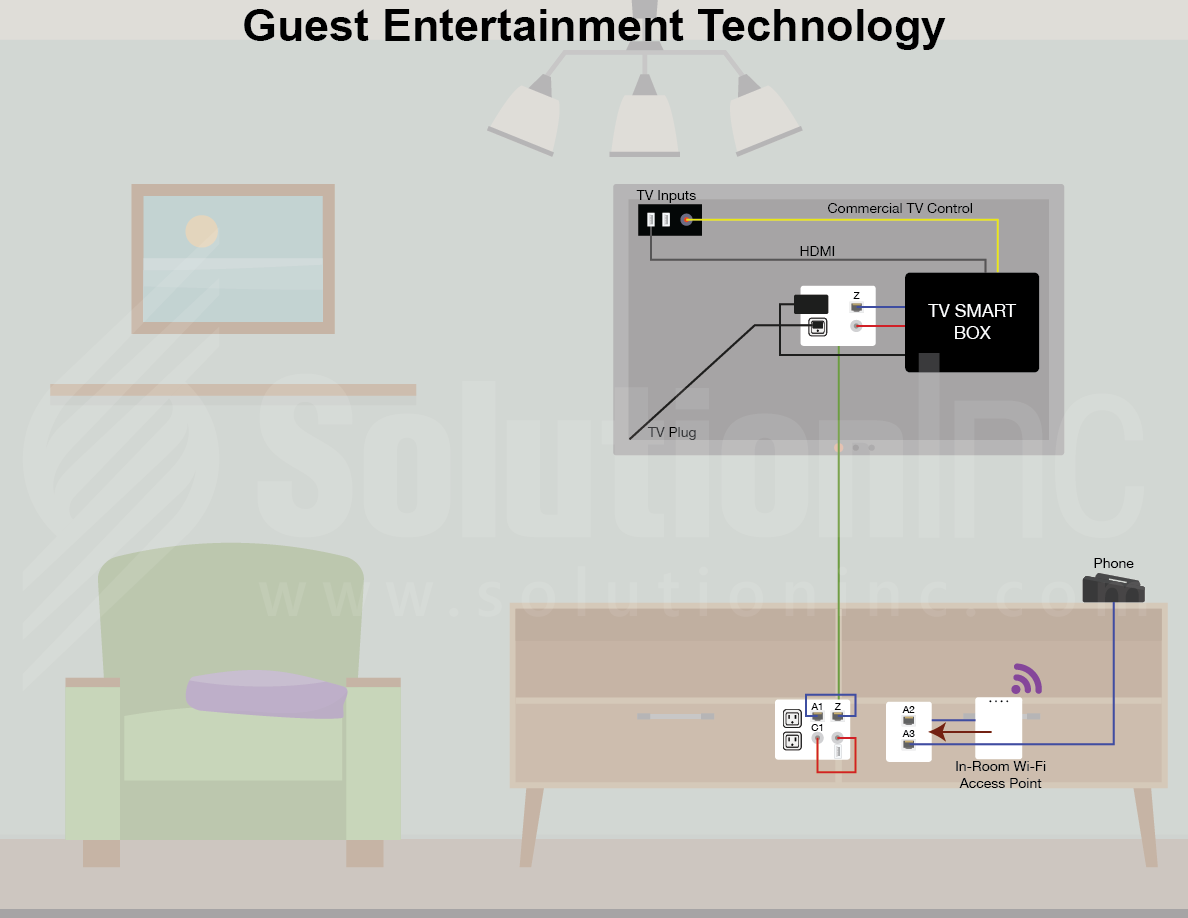
- It is important to remember that there are multiple devices in each room that require power supplies and cabling. See our example below that includes a phone, a TV (with a TV smart box), as well as a WiFi access point. The TV requires COAX, the access point needs CAT6 and the phone needs CAT6. But don’t forget, placement of these items is important when it comes to cabling; see our living room example where the phone sits alongside all other technology items in the room.
- Having an in-room termination box for cabling is overkill if the building is going to stay a Vacation Rental, although it is acceptable in case the building ever changes from a Vacation Rental property into an apartment building. In this case we recommend using plastic hinged units instead of metal units. The metal units are more difficult to install and maintain and therefore takes longer to service. Within a set-up like this, you can easily convert to a residential building again and have multiple carriers offer your tenants service.
- We recommend having one WiFi access point in each unit for your hotel/Vacation Rental. This ensures that if an access point fails, a nearby room can have its service amplified to make up for the failed hardware. This ensures continuity of service while the item is being repaired or replaced.
Bedroom Example:
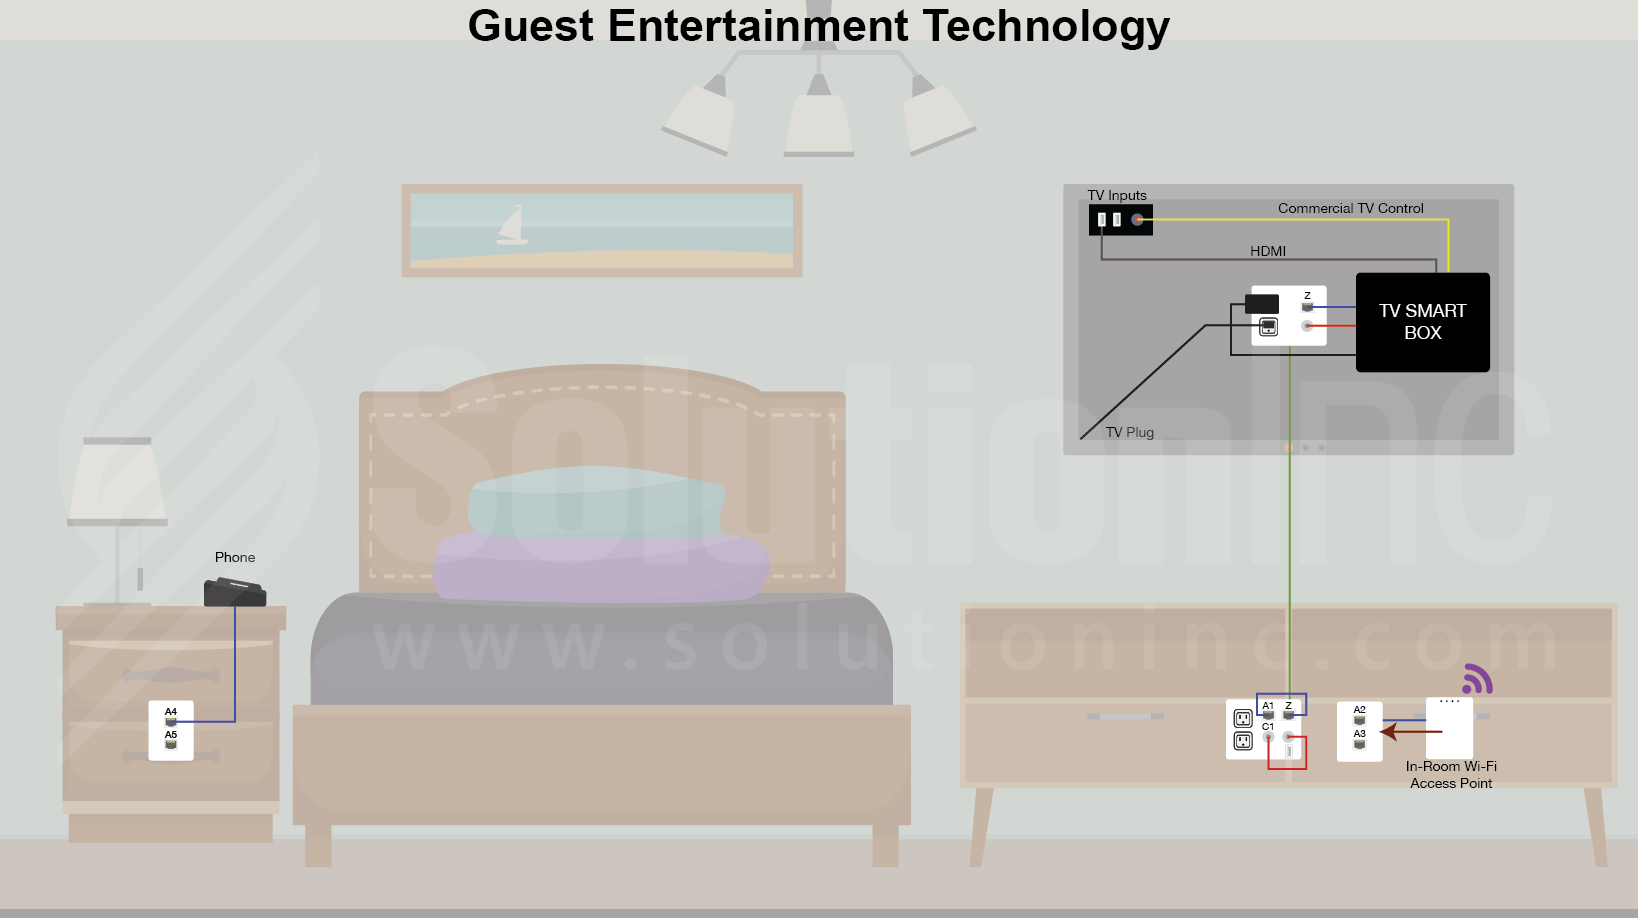
Living Room Example:
Summary Floor Plan:
#5 As with many hotels, the property could feature additional amenities to their guests. These could include free lobby WiFi, WiFi or TV access in gyms, common areas, staff rooms, room tops, etc. You should make sure to include this when discussing your cabling options so that these areas are included in your scope and to avoid any surprises.
Conclusion
Our deployment experts have accumulated years of industry knowledge enabling us to generate this information to ensure that any commercial WiFi network deployment is done to the highest standards. Sharing these details with your builders, cabling companies, or project managers will help to ensure that your building is set-up appropriately to match your needs and guest expectations. Or better yet, contact us and we will customize this plan to meet your specific needs to ensure that your deployment runs smoothly allowing you to focus on your other priorities.